How to use Separation Buddy: Your complete step-by-step guide
Welcome to Separation Buddy!
If you're here, you're probably dealing with one of the most heartbreaking challenges dog owners face: watching your pup struggle when you leave. We get it. We were going through it ourselves, which is why we created Separation Buddy in the first place.
Whether your dog is barking, destroying things, or just looking utterly miserable when you grab your keys, separation anxiety is tough on everyone involved.
The good news? You don't need to spend thousands on trainers or feel hopeless about ever leaving your house again. Separation Buddy uses the same evidence-based methods that certified separation anxiety specialists use, but packaged in an easy-to-use app designed to help you build lasting habits.
This guide will walk you through exactly how to use the app, step by step. We'll cover everything from your first baseline assessment to tracking your progress over weeks and months. No complicated jargon, no overwhelming theory. Just clear, practical steps to help your dog learn that being alone is actually okay!
Let's get started.
Step 1: Download Separation Buddy from the iOS App Store
First things first: download the Separation Buddy app from the iOS App Store!
Once you've downloaded the app, you'll work through the onboarding steps and have the chance to start a paid plan. Upgrading gives you full access to the app, but there's no need to do this immediately.
The free version allows one training session per week, plus access to five Exercises on your first day, and five weekly from then on. For this guide, we'll be using a paid plan, which gives you unlimited access to all features, but feel free to start with the free version to get a feel for things!
Step 2: Take the baseline assessment
Assess your dog's starting point
Your baseline assessment is where you figure out where your dog is at with their ability to cope with alone time. This is crucial, as we don't want to set a baseline that's too high and makes your dog uncomfortable (pushing your dog out of their comfort zone too quickly can actually harm progress), but we also don't want to go too low and slow down your progress unnecessarily.
Important: The baseline assessment is for dogs that can handle at least 30 seconds alone. That means you can go out the door or into another room for 30 seconds without your dog showing signs of panic or unusual stress signals.
Can't do 30 seconds yet? No worries! Head to our "Exercises" tab instead. You'll find a set of evidence-based desensitization training exercises there to help your dog get comfortable with common triggers that lead to separation anxiety symptoms.
How to conduct your first baseline assessment
Ready to get started? Here's how:
- •Select your baseline target (for example, 50 seconds)
- •The assessment screen will show you a series of steps — the first step will automatically be selected
- •Start the timer, go out your front door, and return when the timer ends
- •Wait a few seconds between steps for your dog to reset (some dogs can go straight into the next one) and be fully calm again
- •Complete all the steps in sequence
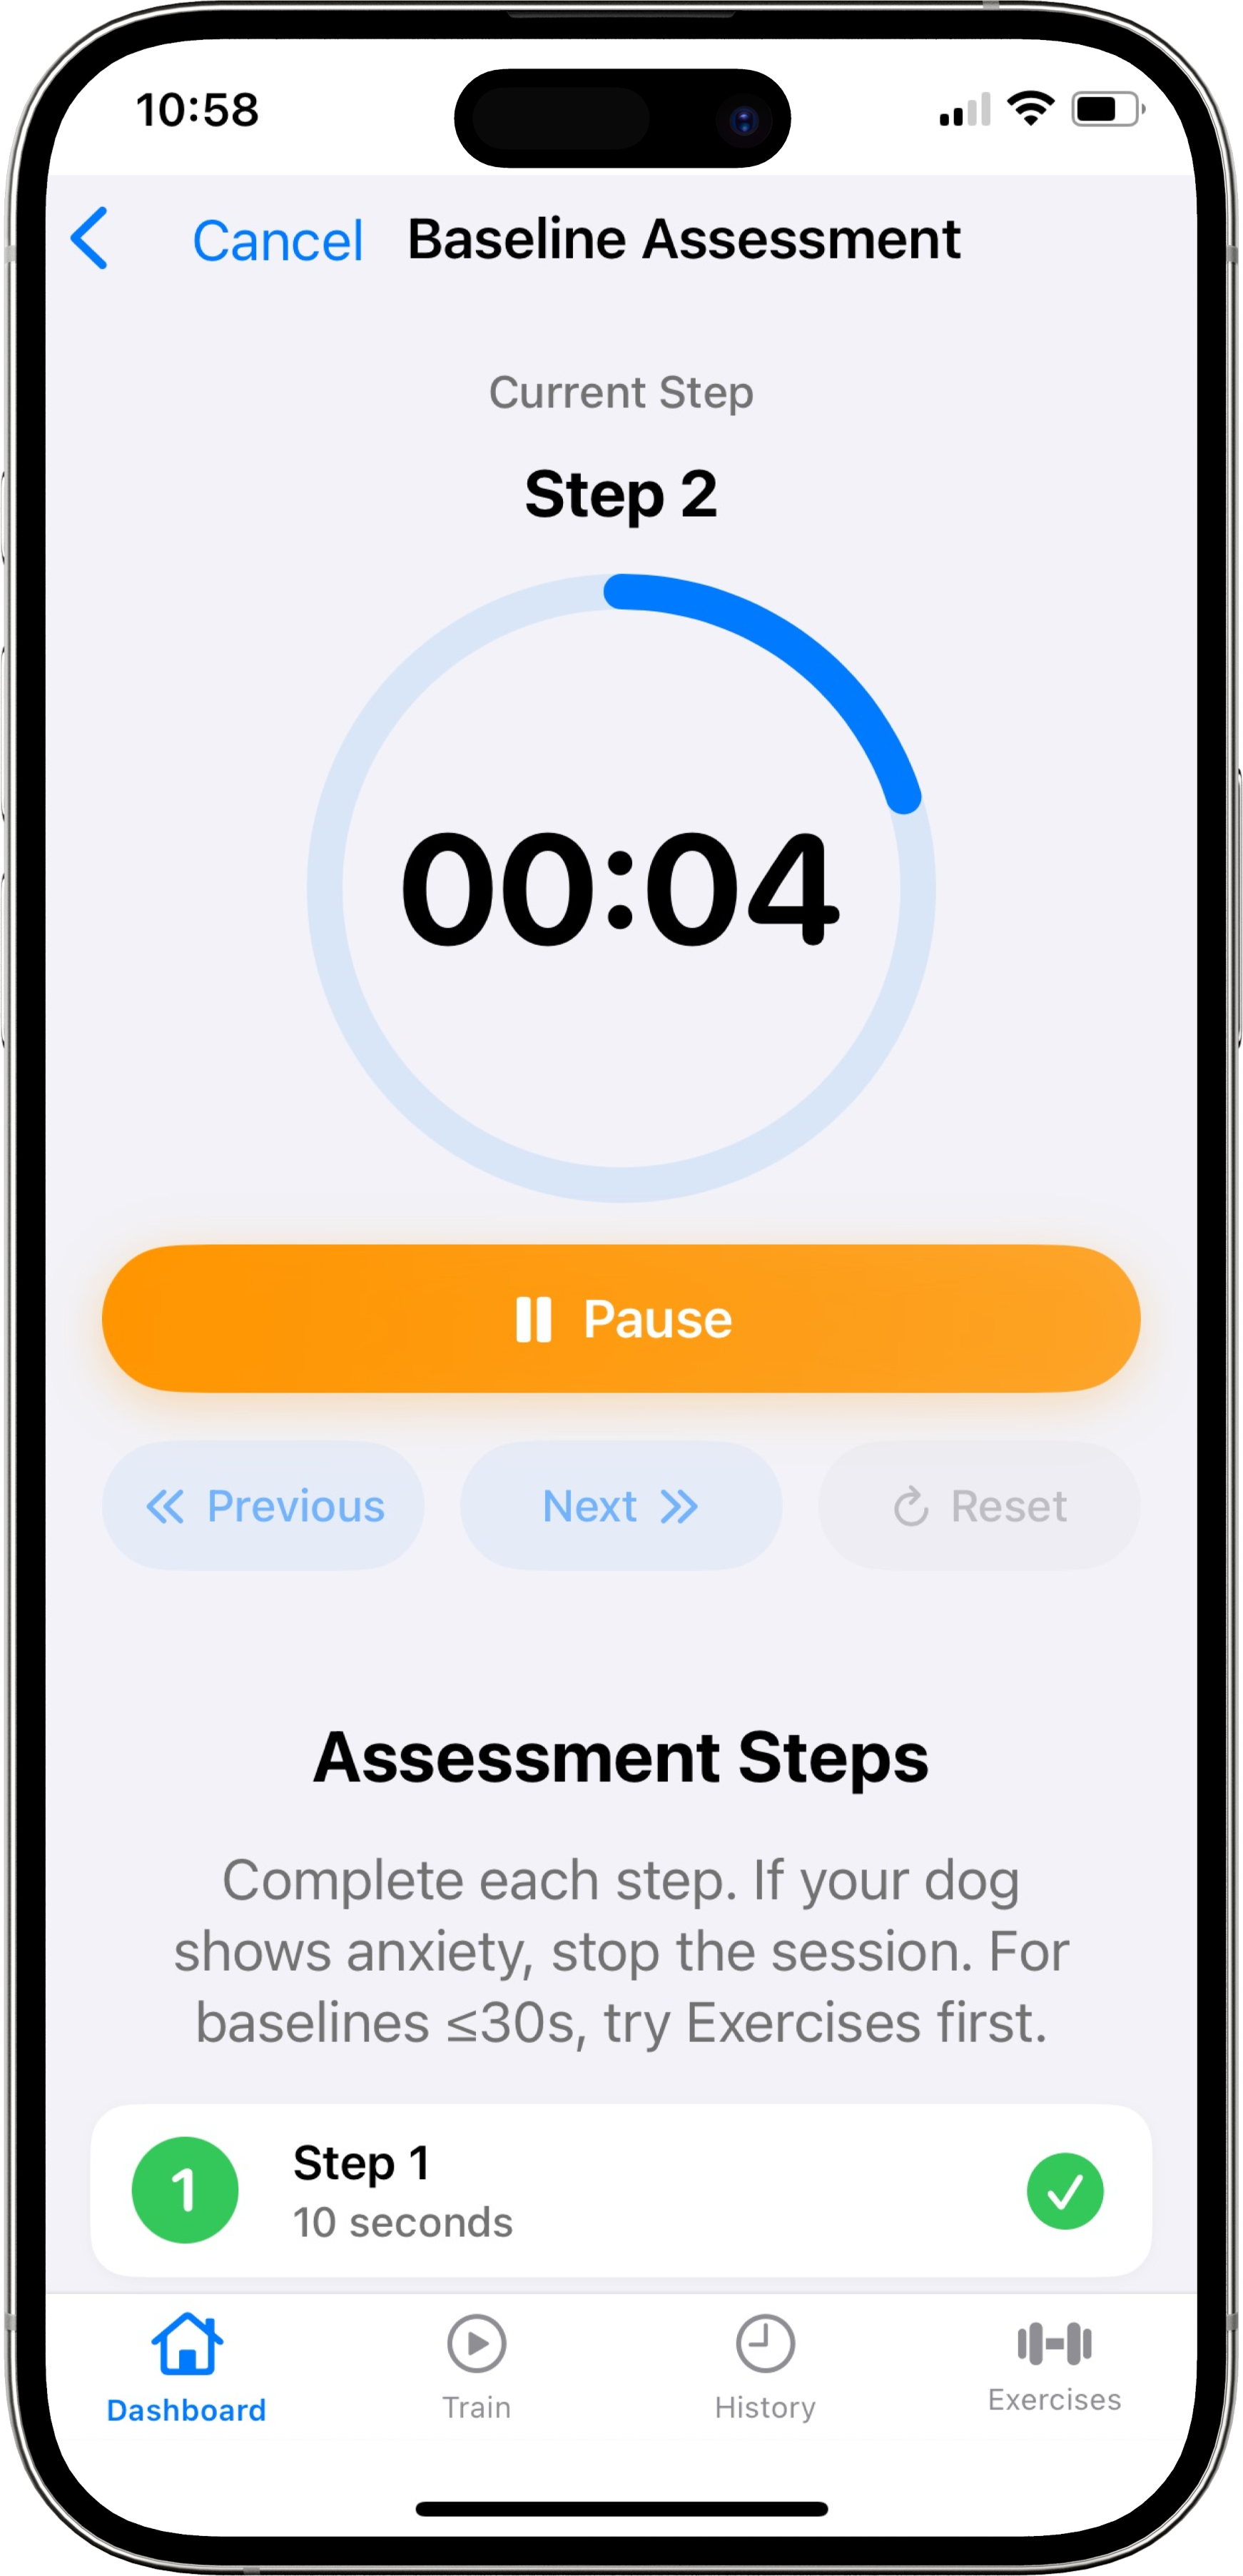
Once you're done, a pop-up will ask if you want to confirm this as your baseline. If your dog handled it well, click "Yes, Update Baseline." If they struggled, click "No" and try again with a shorter time.
Setting an accurate baseline is key, as this feeds directly into our adaptive timer, which we'll cover next.
Step 3: Using the train tab
Pick your training approach
Now for the important part: starting your separation training journey! On the training screen, you'll find two options:
Option 1: Adaptive timer (recommended)
This is the core of the Separation Buddy app. Our smart algorithm adjusts based on your dog's performance. Rate sessions highly (8-10)? The timer gradually increases. Dog showing stress and you're rating sessions lower than usual? The timer gently steps back and reduces your next session length or keeps it where it is. This keeps your separation training in your dog's comfort zone, while still making progress.
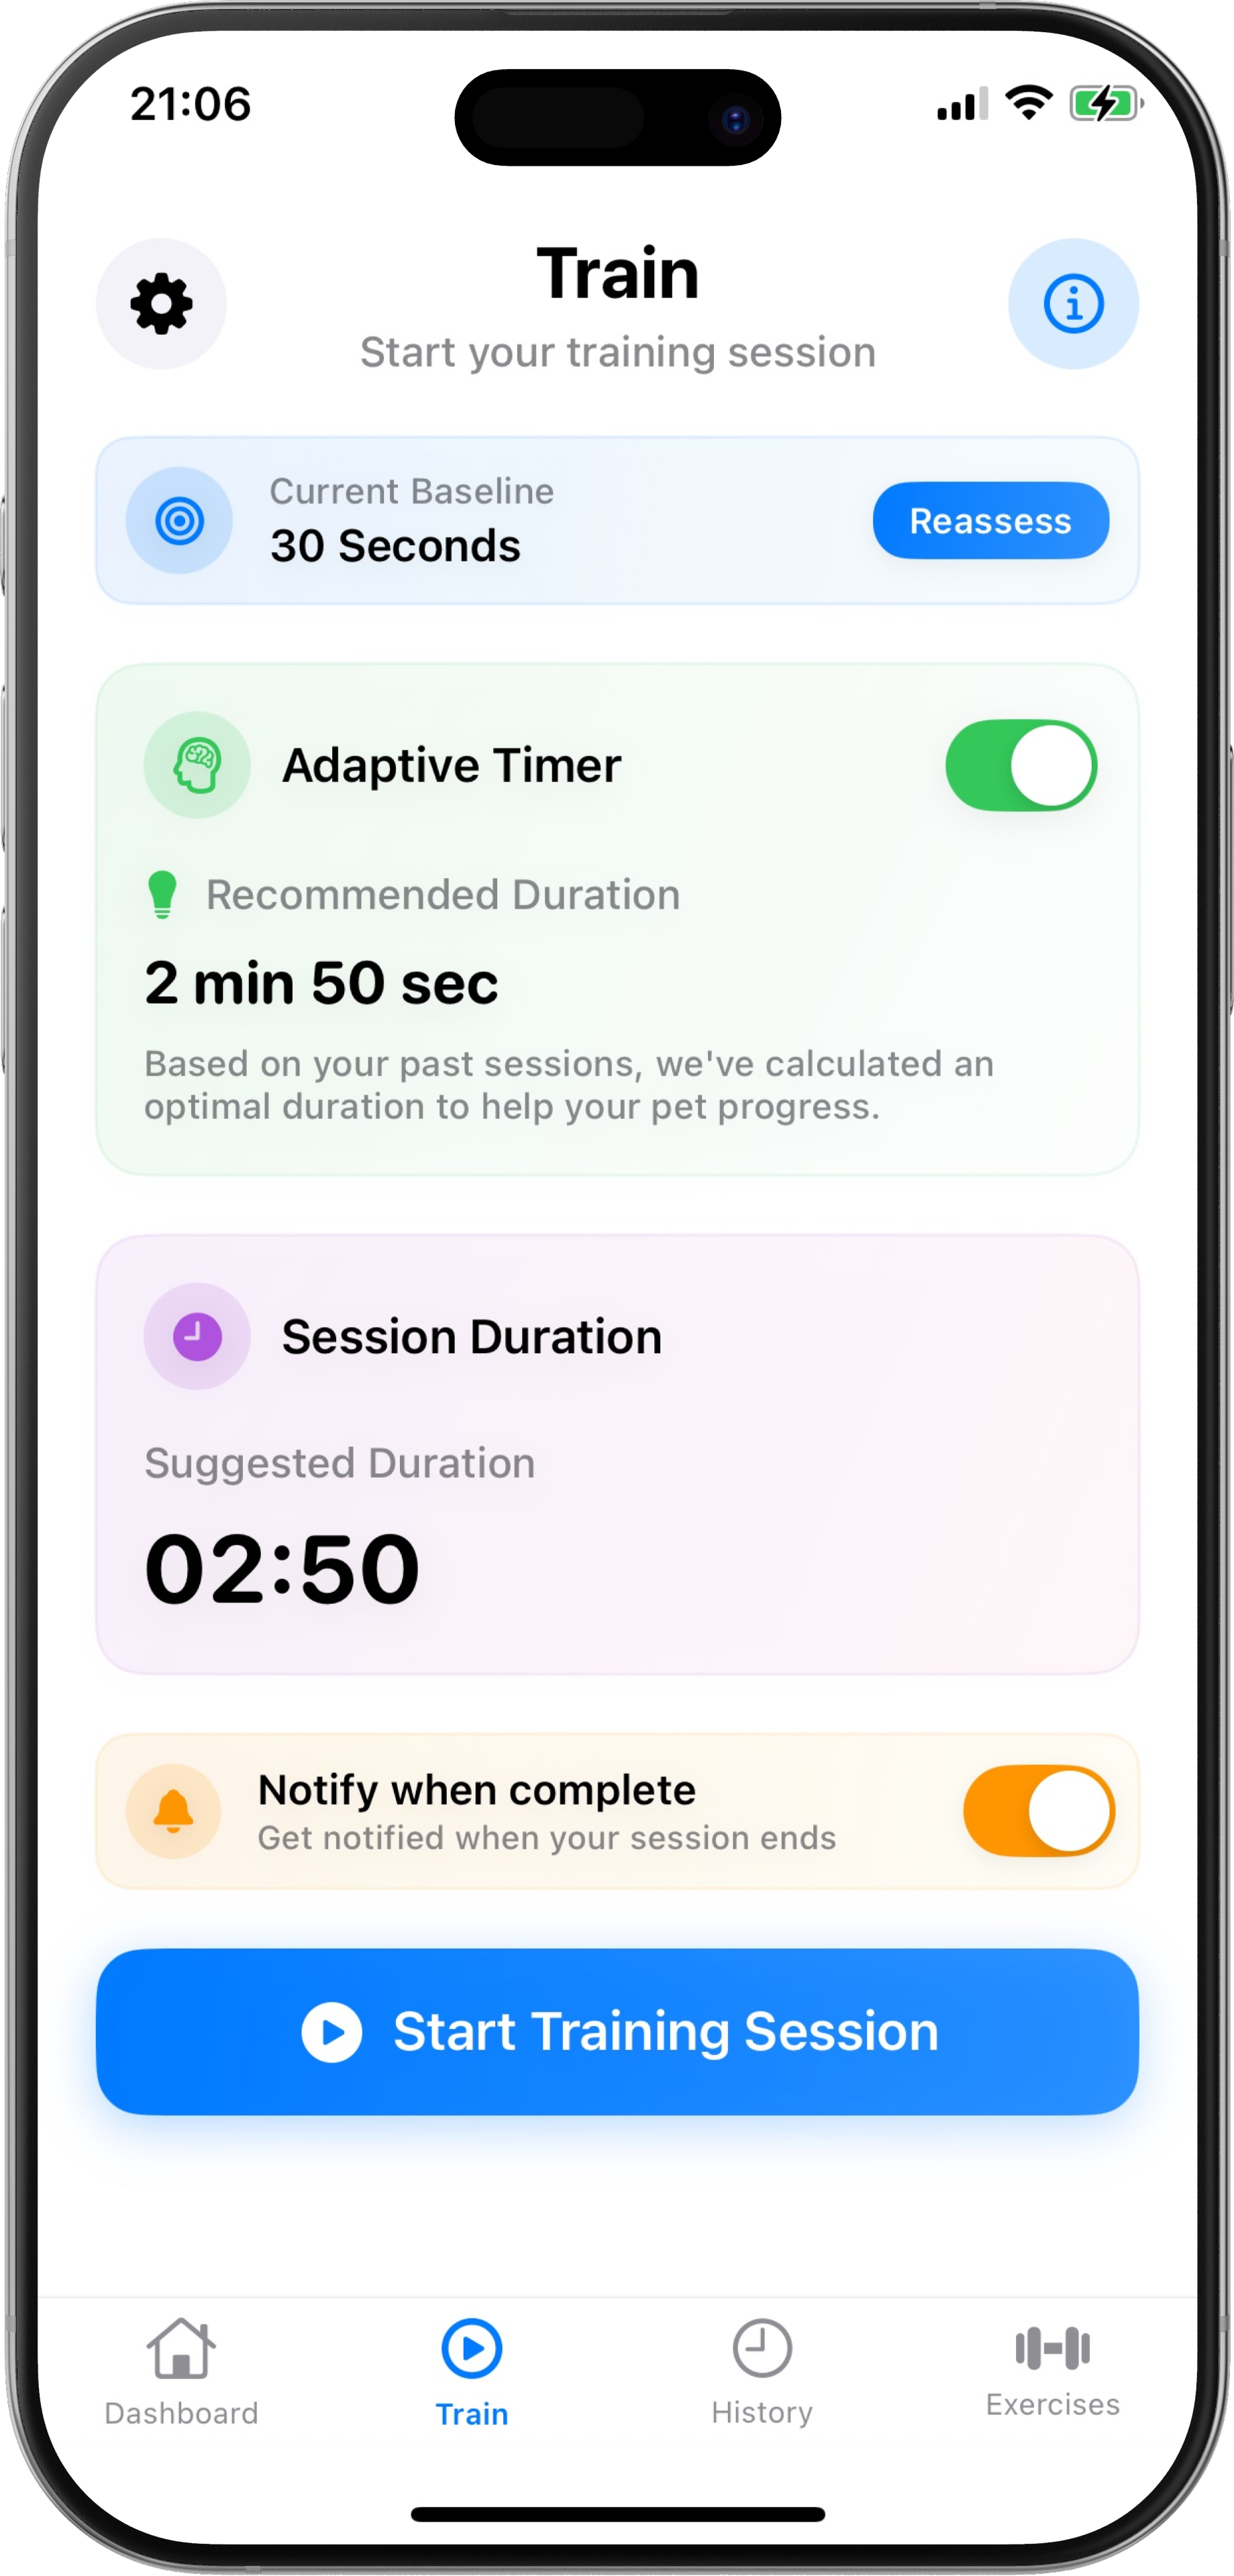
Don't worry if the timer doesn't always change after a session — staying at certain durations for multiple sessions is completely normal! Dogs progress at different speeds, and our timer prioritizes comfort over speed. Pushing too fast risks undoing your hard work.
Option 2: Custom sessions
You can also set custom sessions if you don't want to use the Adaptive Timer. This is perfect if you're working with a professional separation anxiety dog trainer or following a specific plan. You manually set the duration for each session, and get started. Just remember, it's not connected to the Adaptive Timer.
Prepare for success: warm-up steps
When you click "Start Training," you can choose to include warm-up steps. These are short separations that help desensitize your dog to leaving triggers. You can set anywhere from 0-10 warm-up steps.
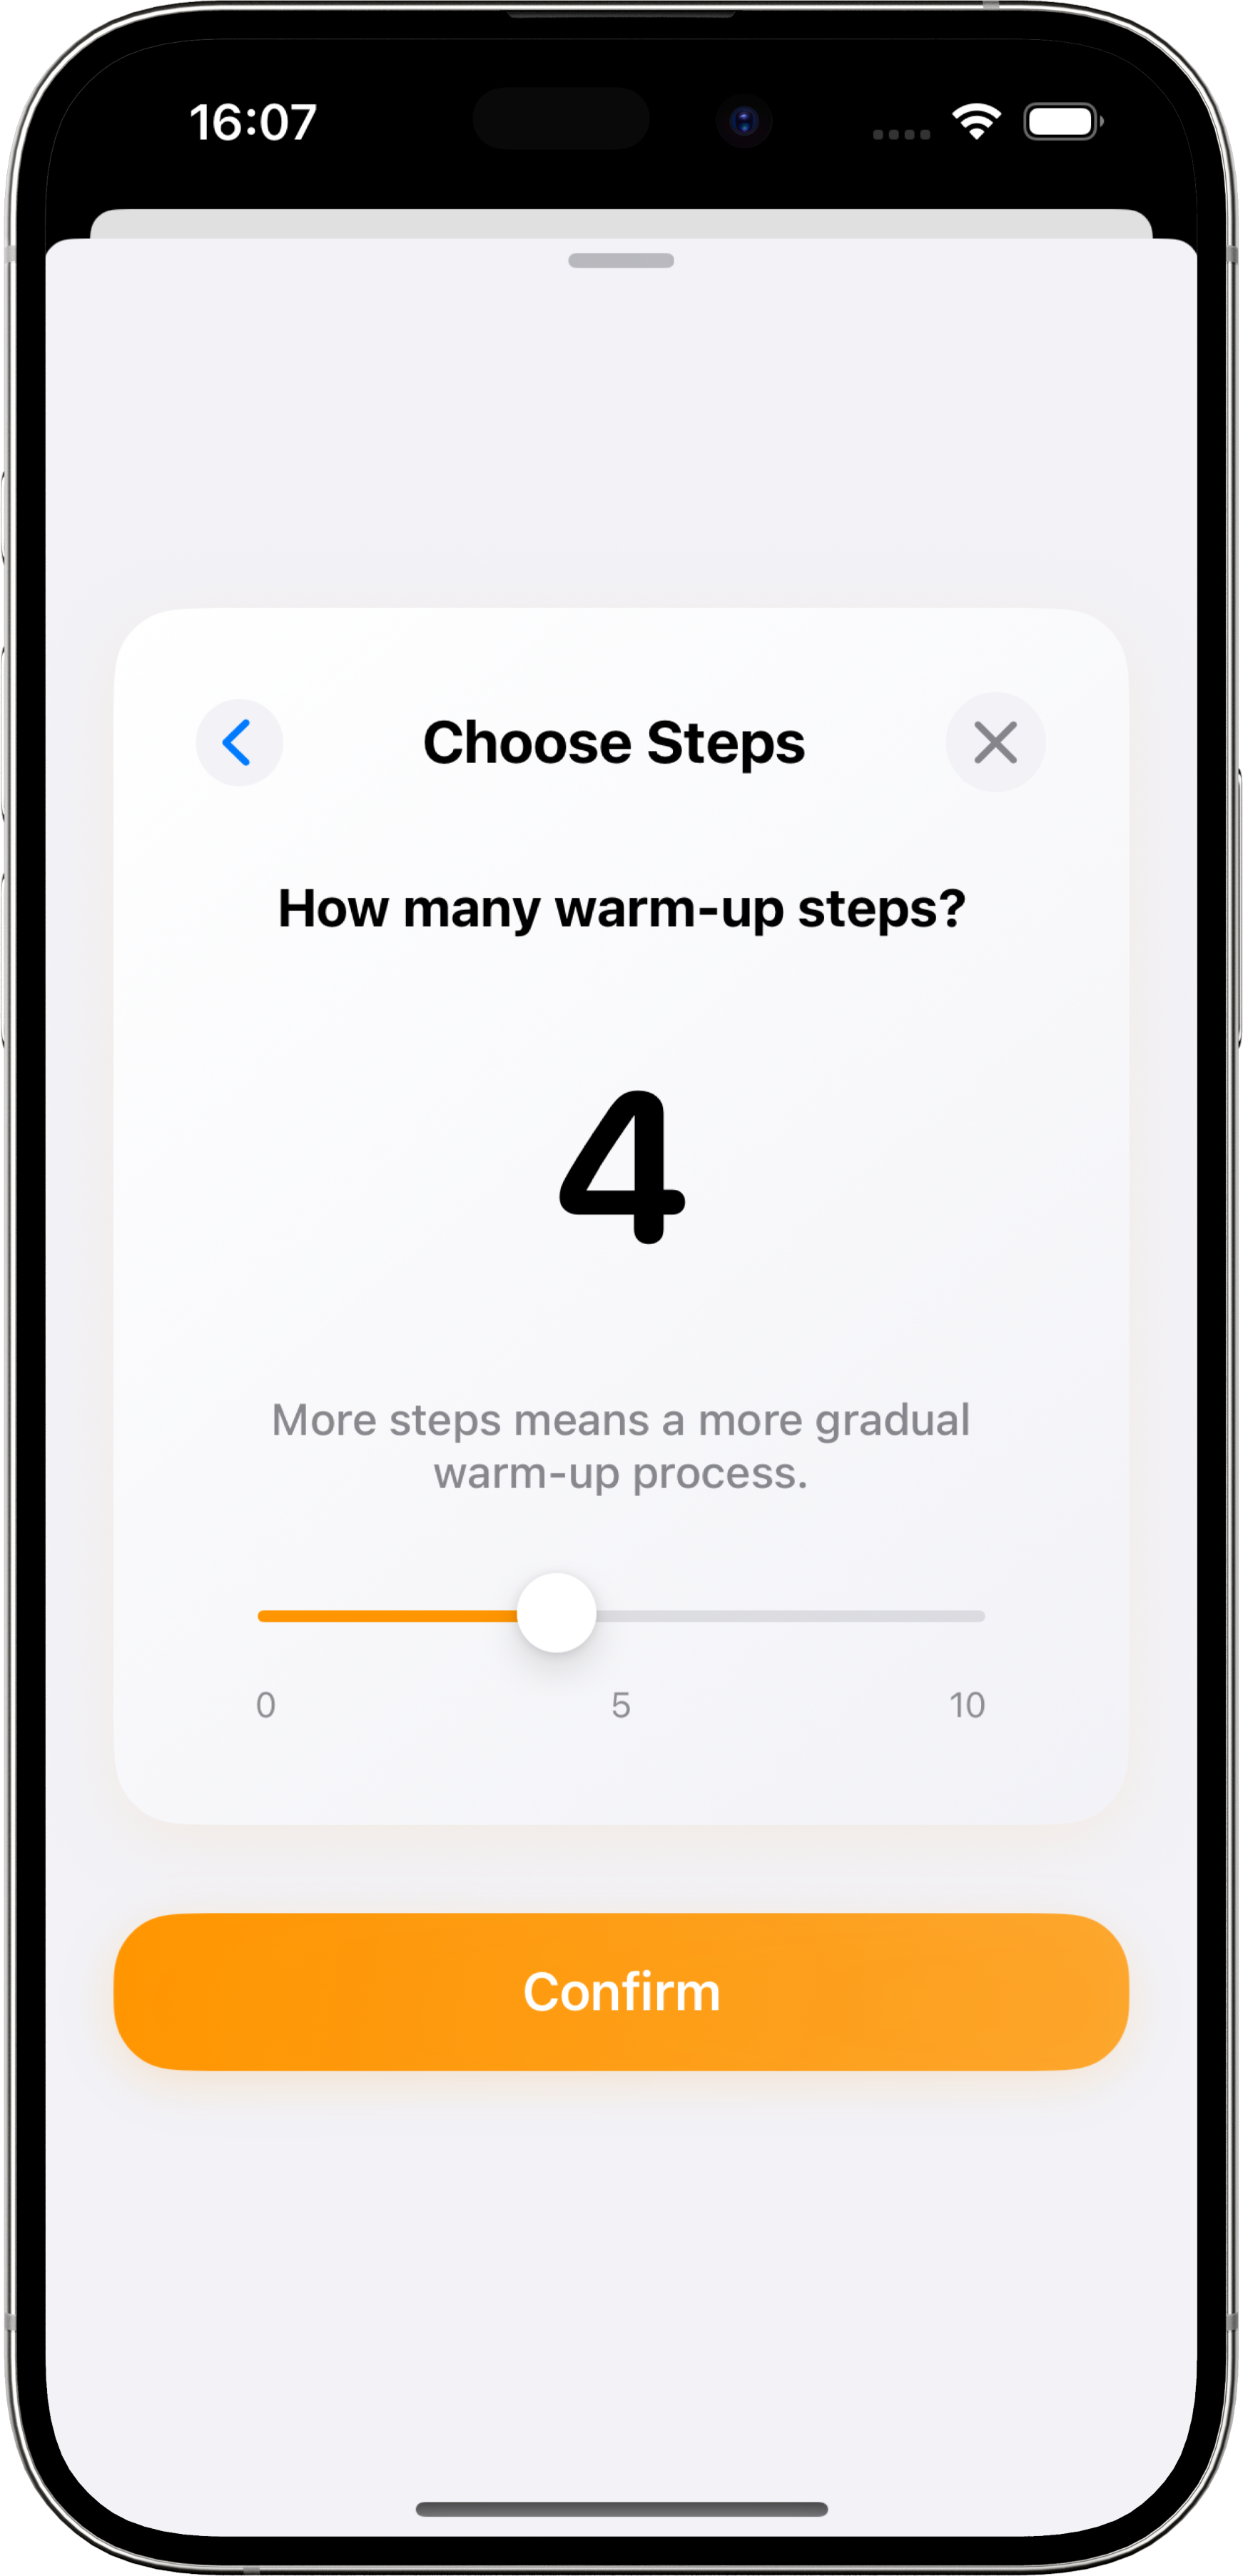
These are completely optional, and you can choose how many you want to take because not all dogs love warm-ups. Our Whippet, Maple, does best with just 1-2 warm-up steps. More than that, and she doesn't respond as well in the actual session. Other dogs do great with more sessions, so pay attention to what works for your pup!
Step 4: Running training sessions
Once your session starts, you'll see our simple, clean timer interface.
Here's how it works:
- •Click "Start" when you're ready to begin
- •Leave the house and wait for the timer to count down
- •You can pause or end early if needed (we recommend using a camera to monitor your dog)
- •If your dog struggles, ending early is smart training, not giving up!
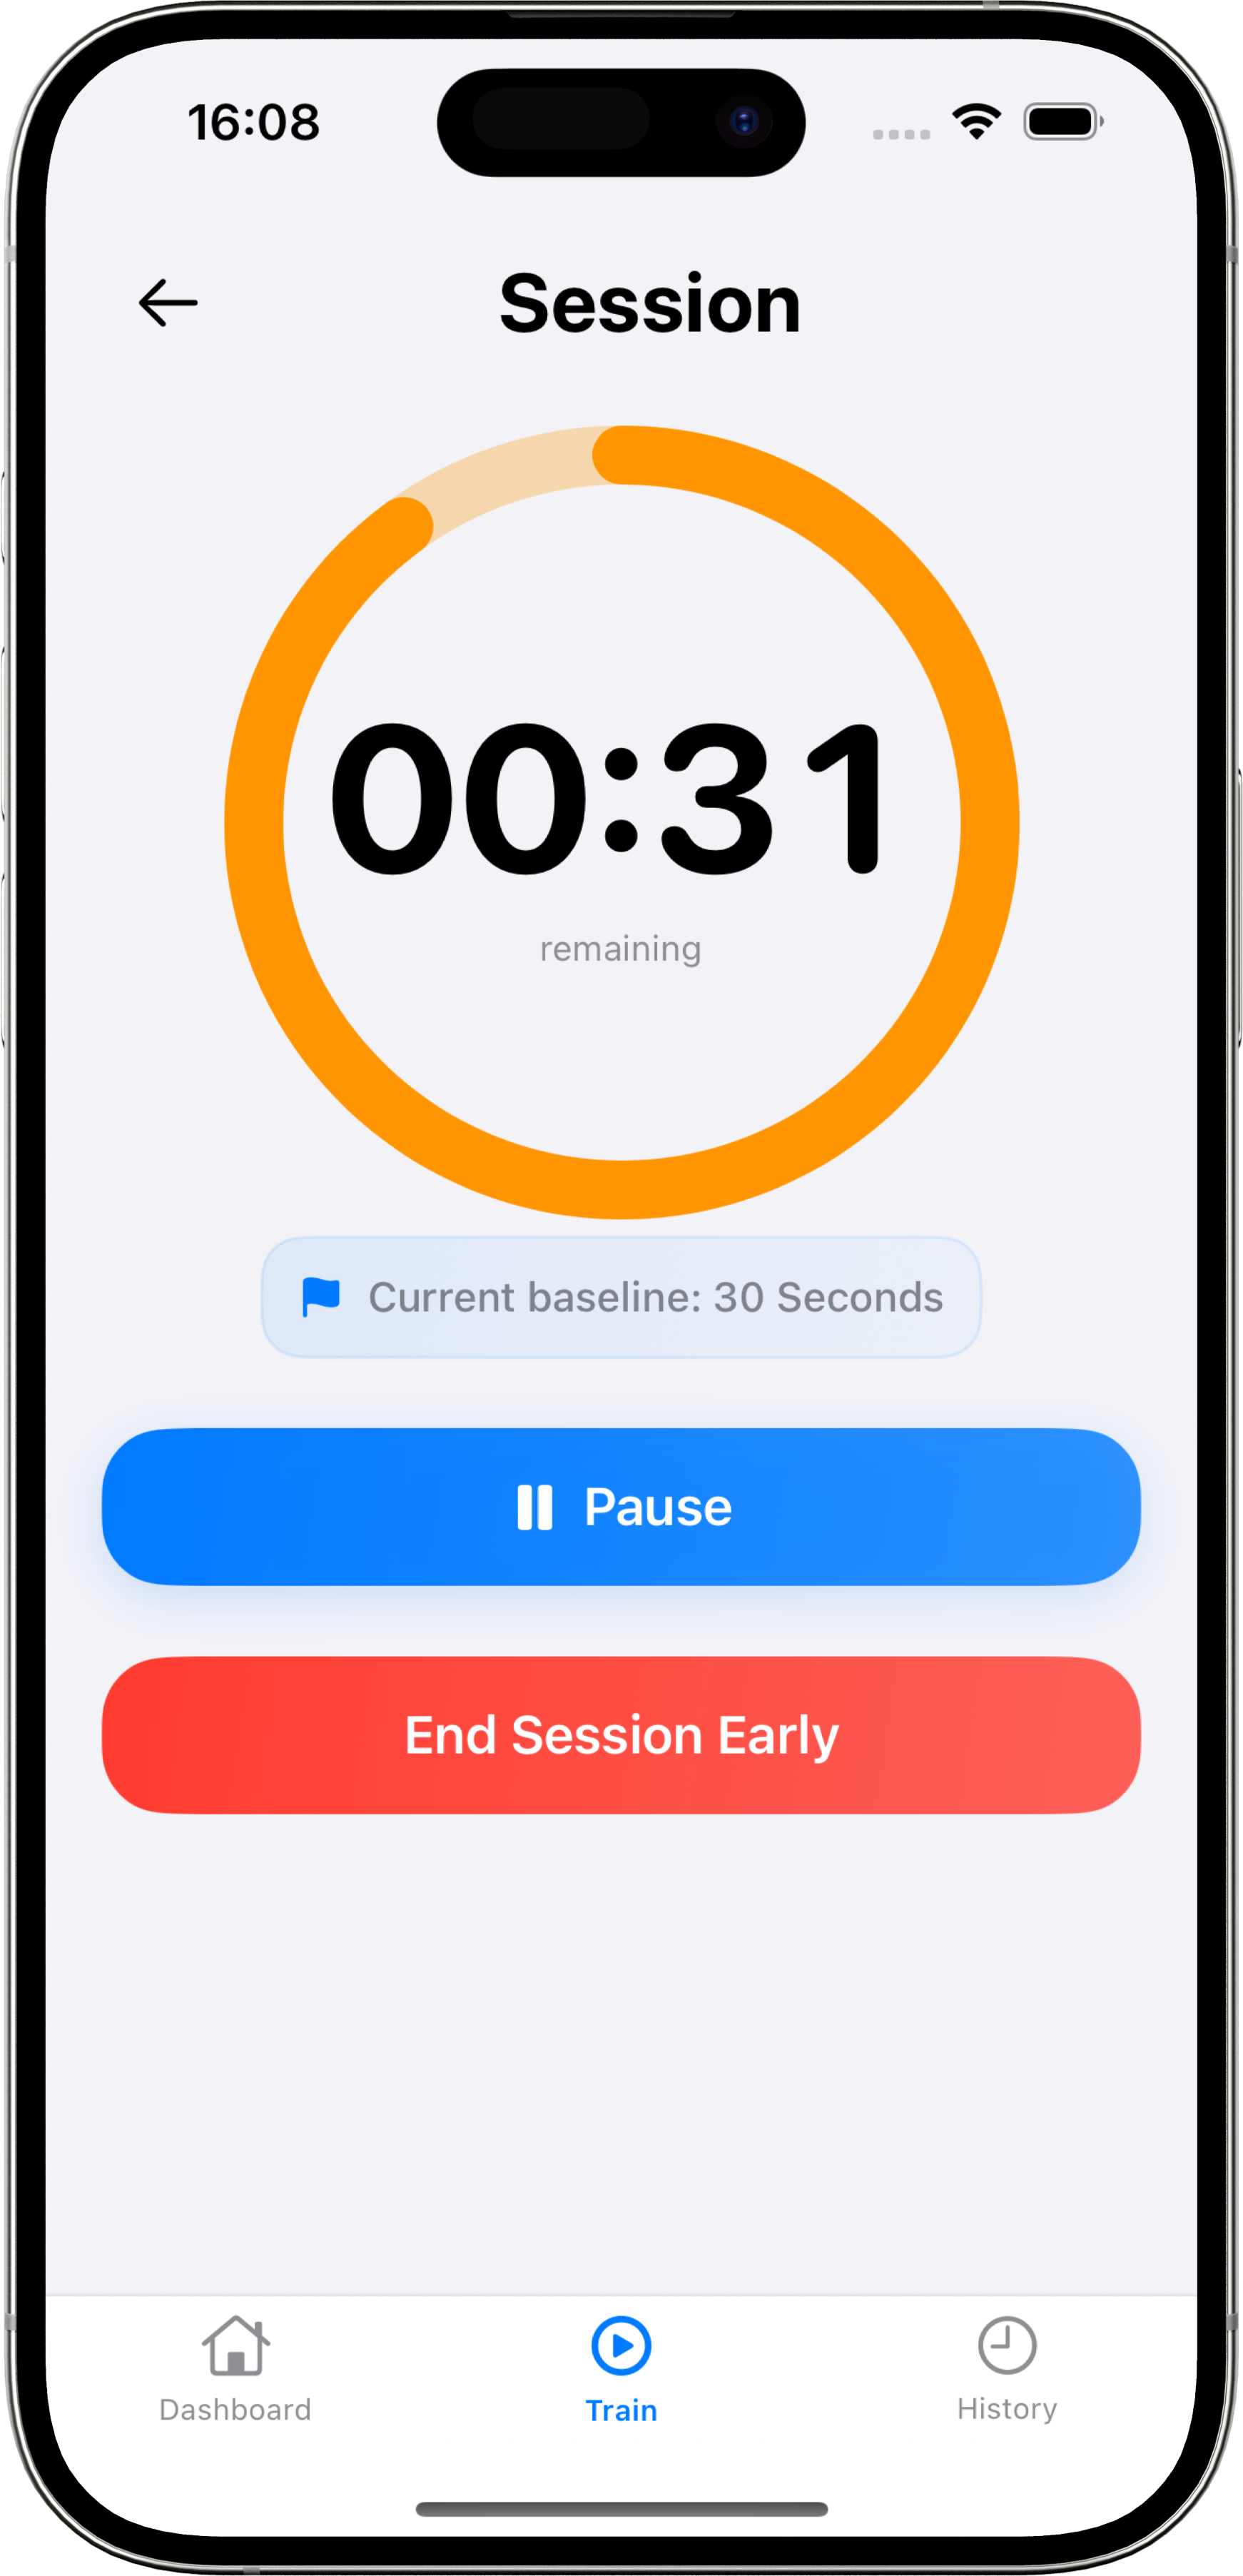
Pro tip: Enable notifications from the Train screen. They'll remind you when time's up so you always get back within your dog's comfort threshold.
Step 5: Post-session rating & notes
Track progress and learn
After each session, you'll rate your session from 0-10 (10 being perfect, 0 being rough). Don't skip this step! The adaptive timer learns from your ratings to recommend appropriate session lengths.
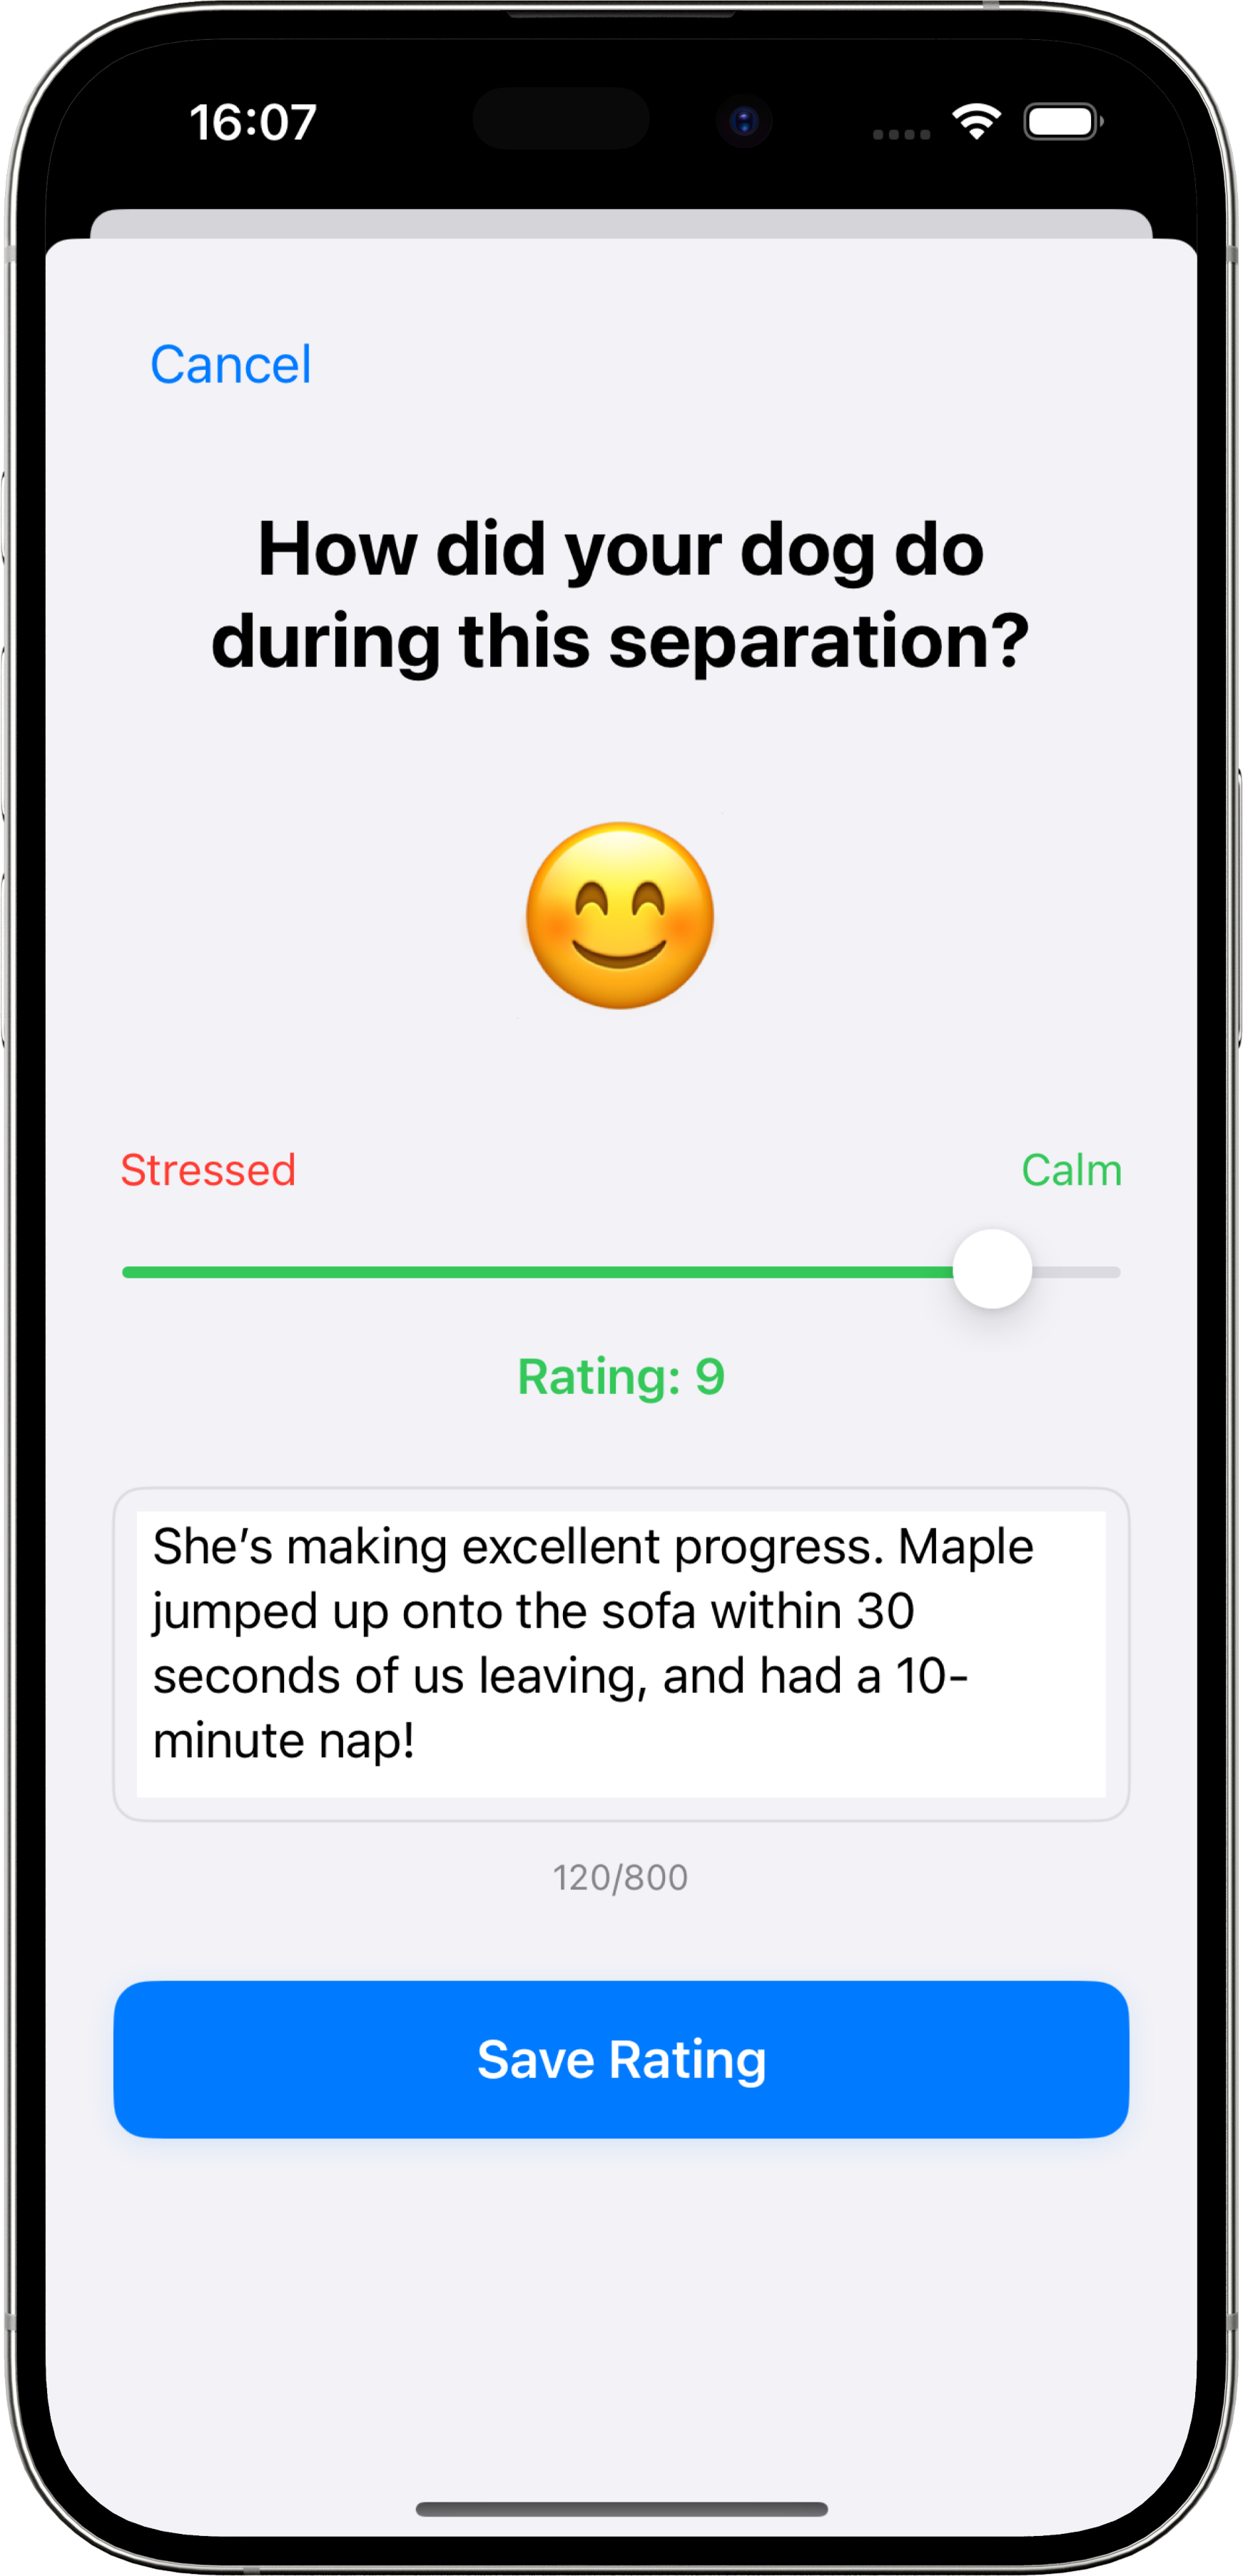
We strongly recommend you rate these as honestly as possible. It's the best way to progress in a way that works for your dog's unique needs.
Adding session notes is incredibly valuable too. Jot down quick observations like "Settled after 2 minutes" or "Seemed anxious at the 5-minute mark." You can always edit these later, and they're gold if you're working with a trainer, because it saves you having to memorise what happened in each session or forgetting to make notes altogether.
Step 6: Review your progress
See how far you've come
The History tab is your progress headquarters. You'll find:
- •A chronological list of all sessions with scores and notes
- •A visual progress chart showing your journey over time
Heads up: This graph won't be super useful in week one, but after a month or two, it becomes incredibly motivating!
Separation anxiety training can often feel like one step forward, two steps back sometimes (trust us, we've been there!). But this progress graph shows the real story. Maybe today you dropped from 10 minutes to 8 (that's okay!). The graph reminds you that just three weeks ago you were at 3 minutes. You're still making excellent progress compared to where you started, so stay motivated!
Step 7: Celebrate milestones
Unlock achievements and stay motivated
Your achievements track major milestones automatically. First perfect 10 session? Achievement unlocked! Training streak? Another badge!
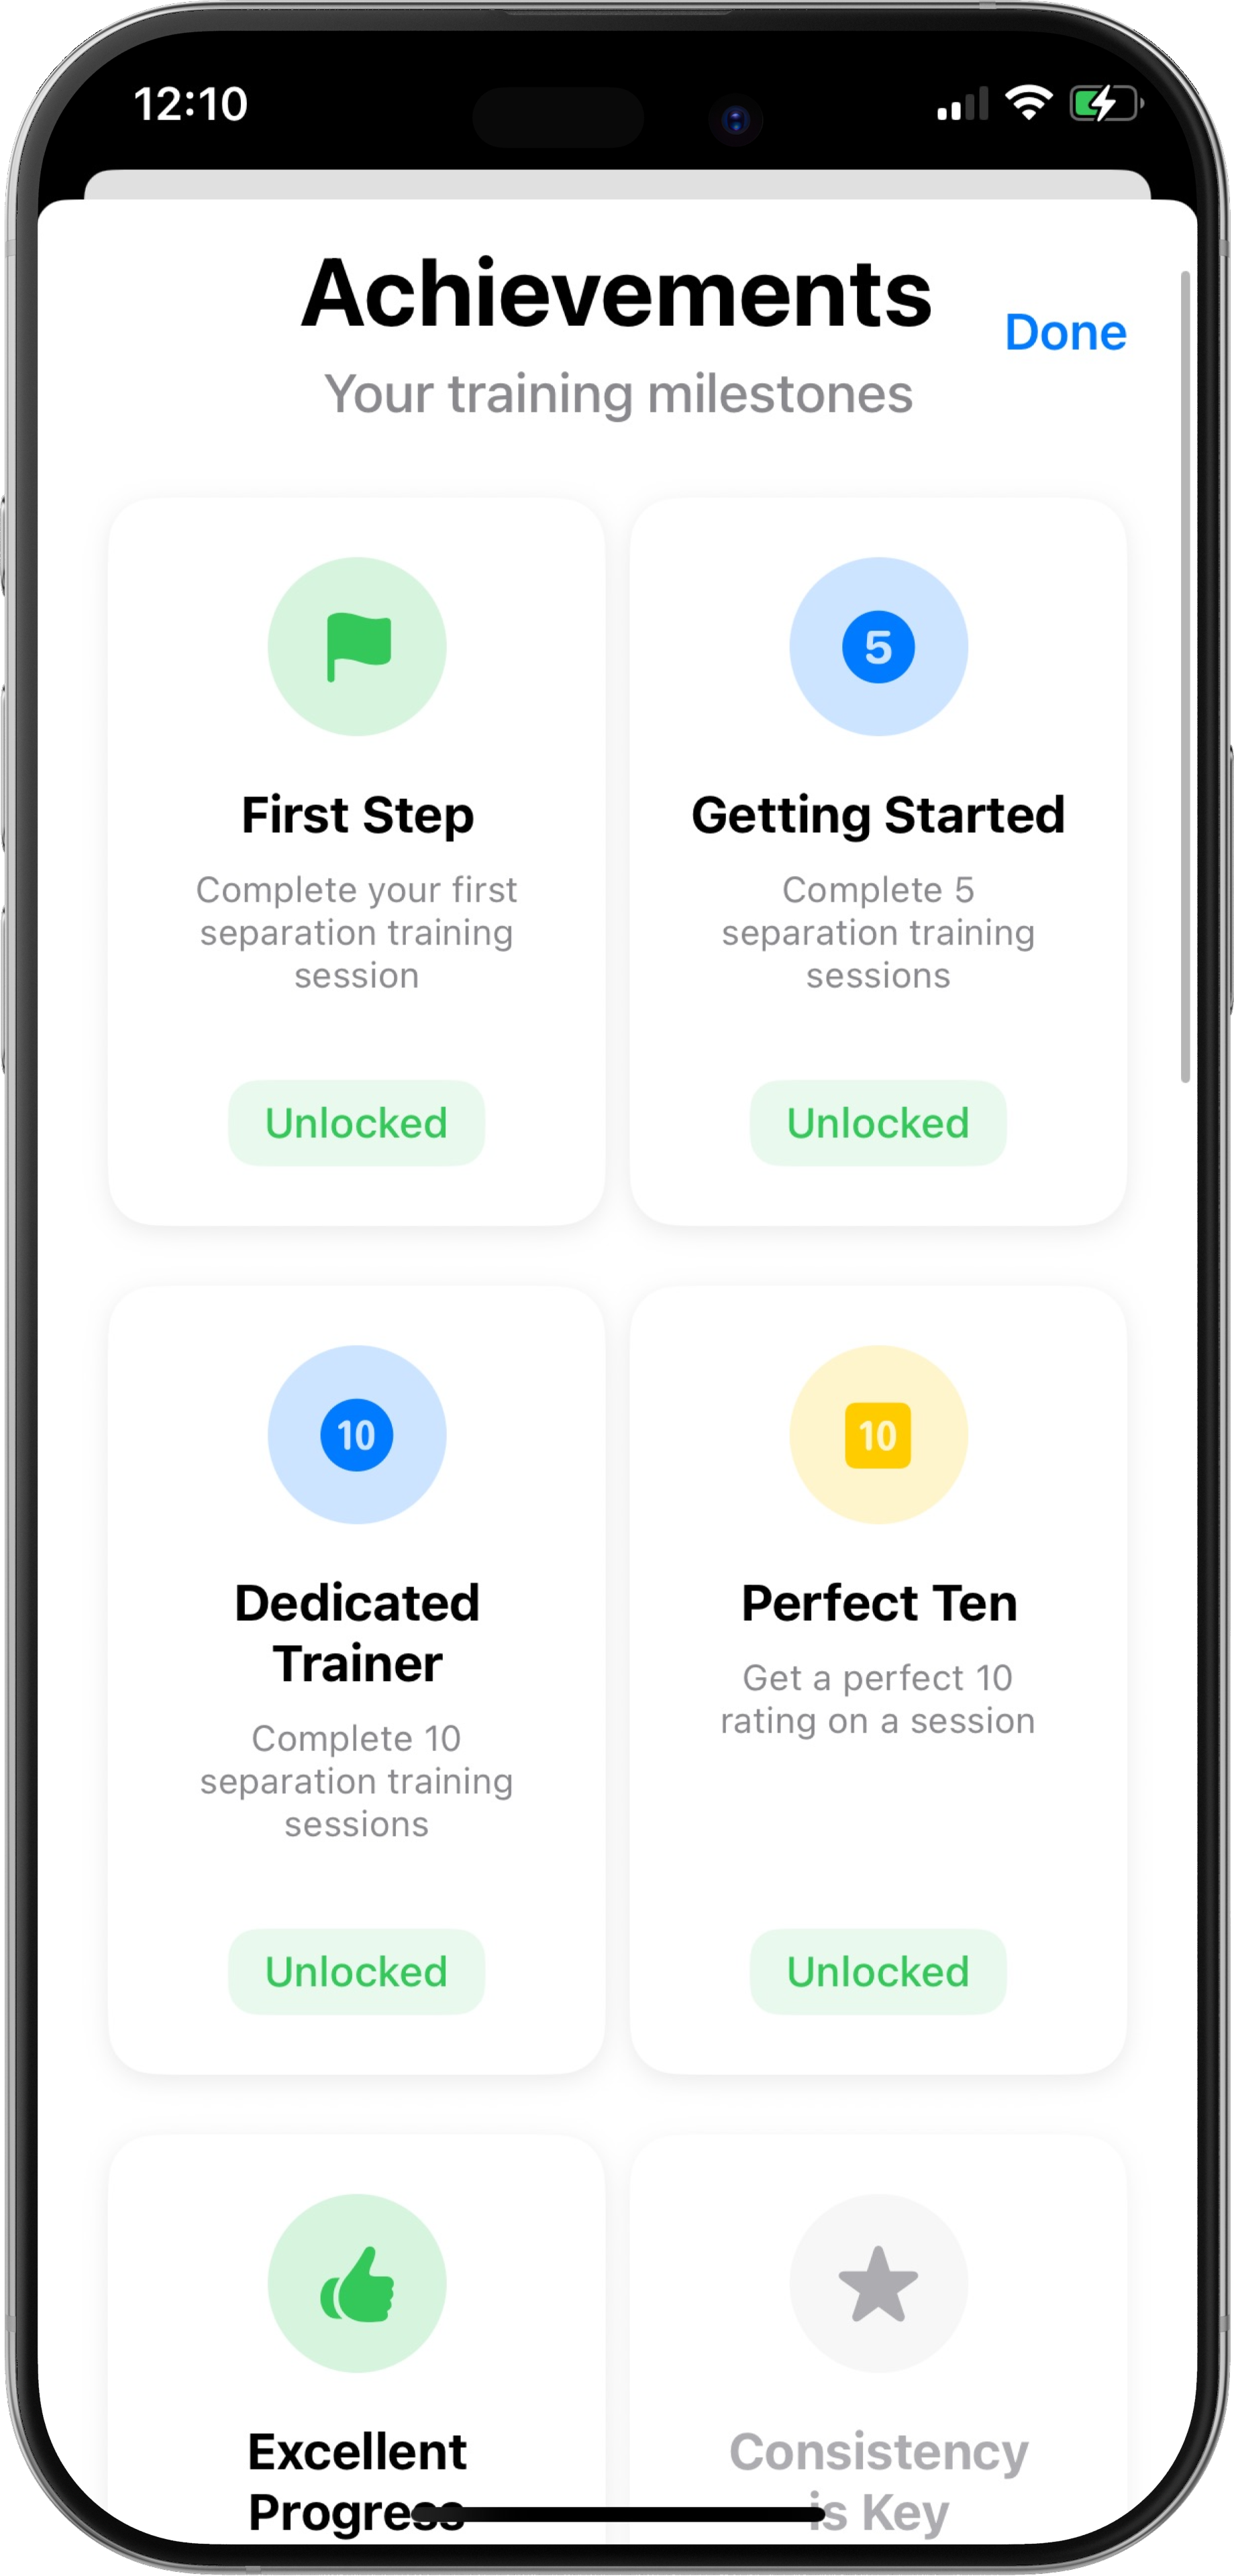
These celebrations can help keep you motivated when training feels tough. Have a personal milestone you're working towards? Let us know and we'll add a new achievement for you to work towards!
Step 8: The exercises tab
The Exercises tab is great for anyone just starting their separation journey.
If your dog can't handle 30 seconds alone yet, you'll find:
- •Front door desensitization
- •Keys and coat triggers
- •Place training exercises
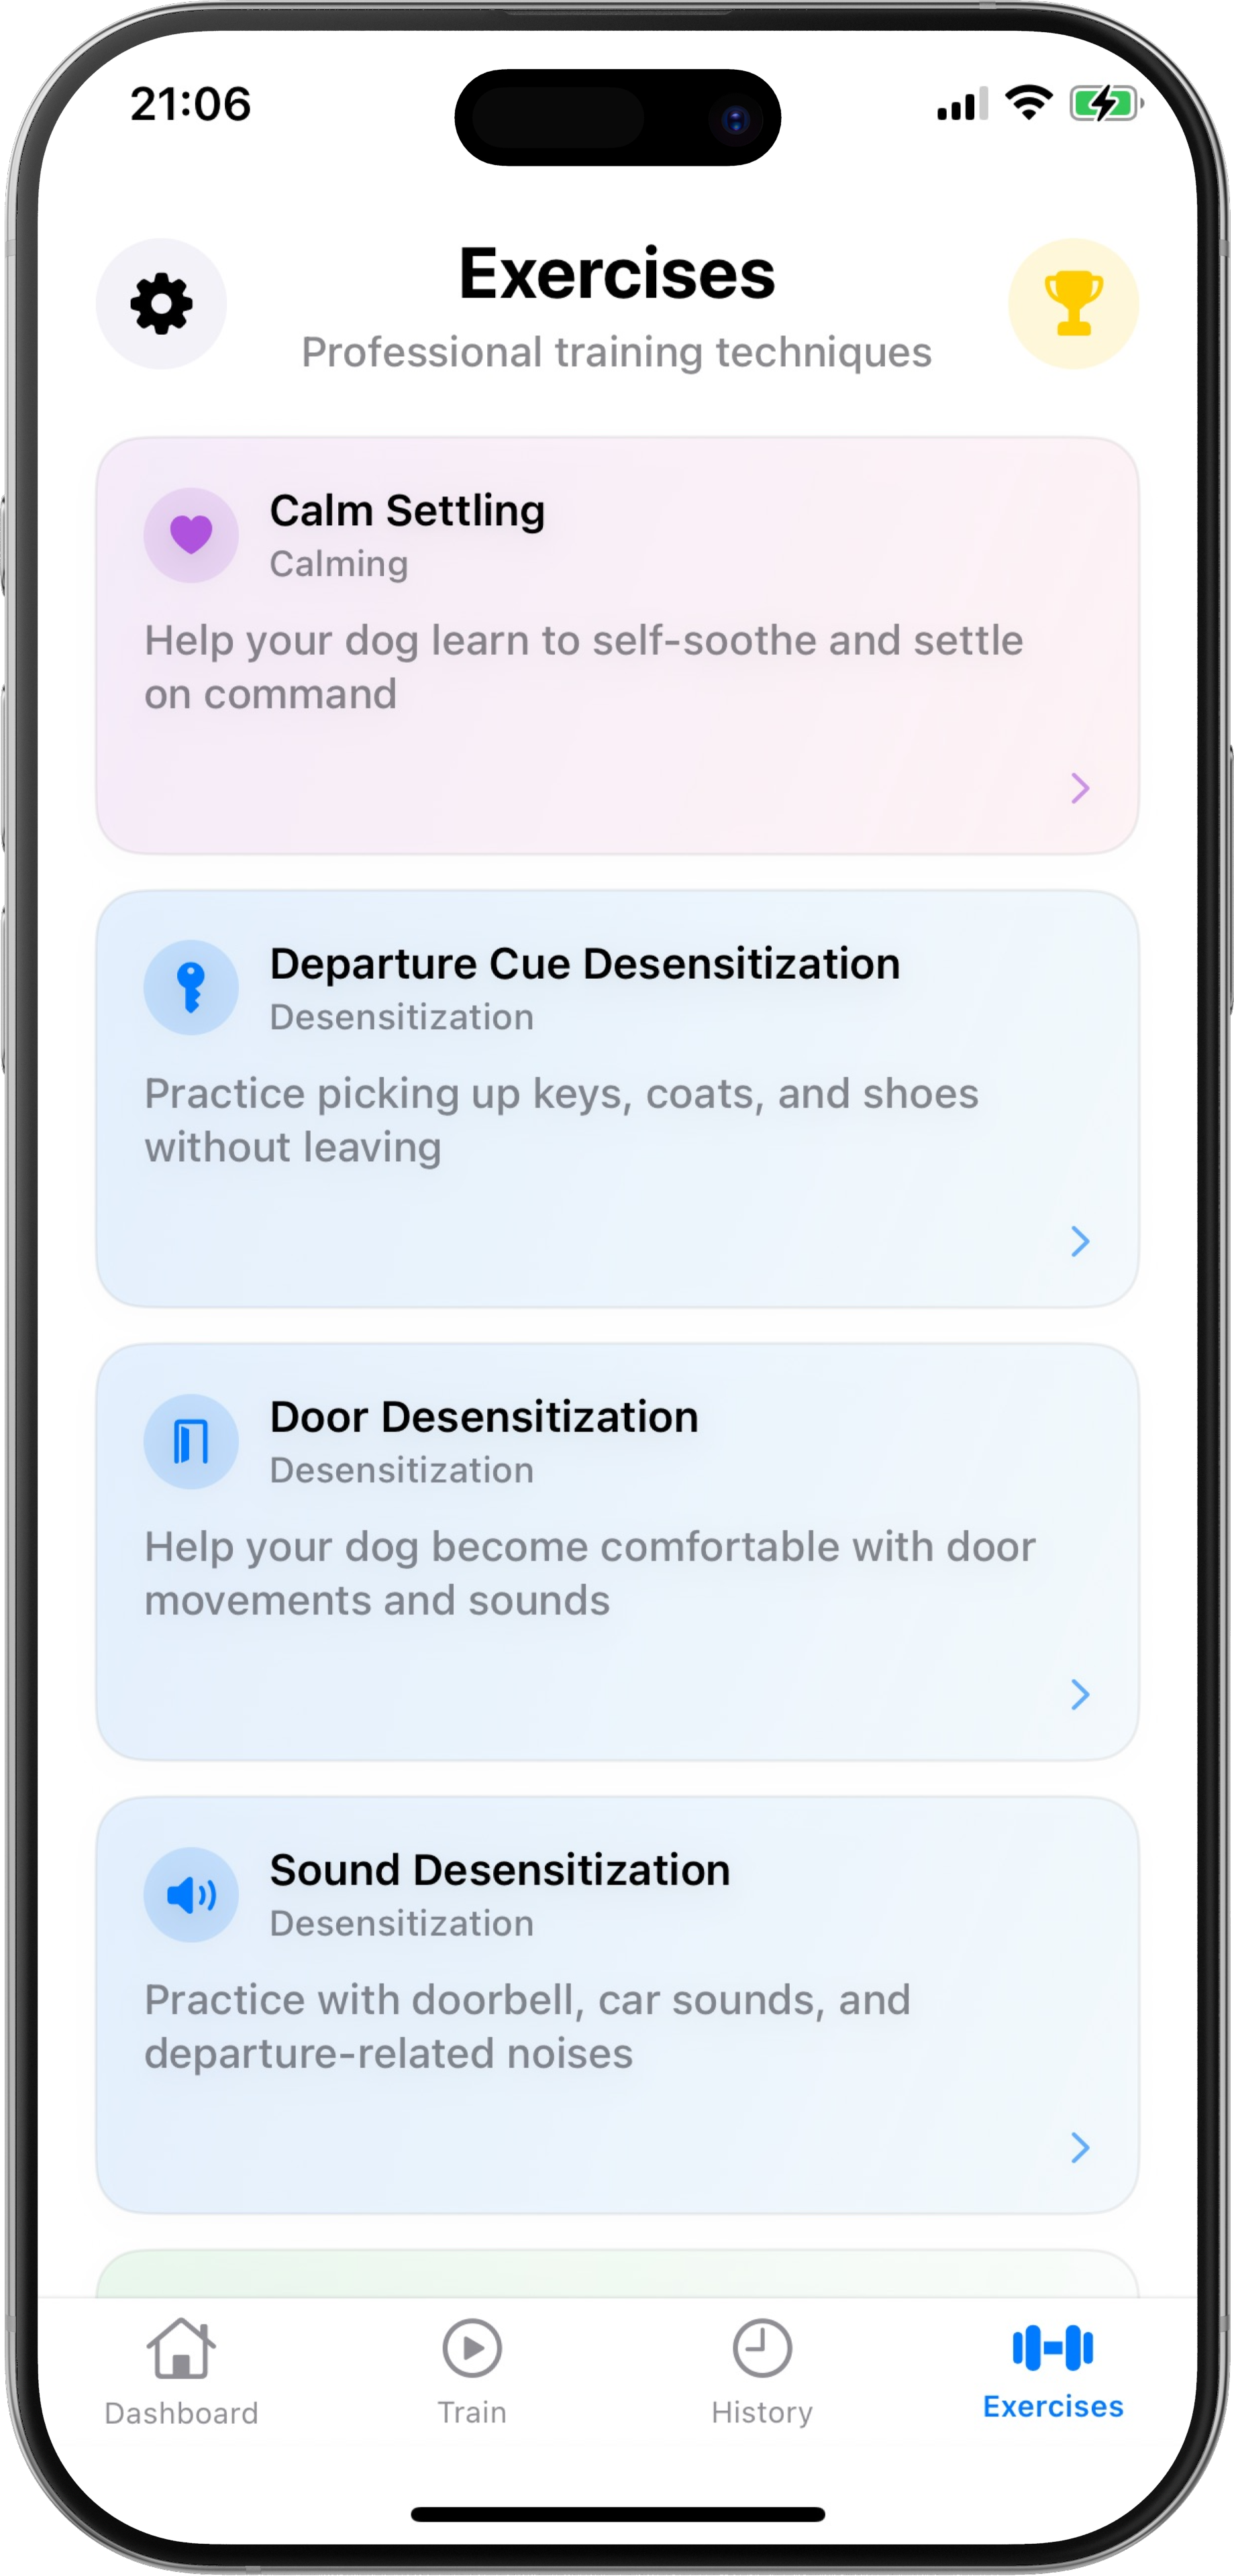
But, these exercises aren't just for beginners! Even if your dog is doing longer sessions, we'd recommend incorporating these into your daily routine. For example, place training builds confidence in being settled while you're in different rooms. Desensitizing your dog to your car keys and shoes? Those are valuable skills for life!
Think of these exercises as the foundation that makes everything else easier.
Step 9: Monitor your dashboard
Your training command center
The dashboard is your home base, showing:
- •Current training streak (keep it going!)
- •Highest session score achieved
- •Sessions completed this month
- •Average session score
- •Other progress indicators
It's a quick visual reminder of how far you've come and helps you stay consistent, which is half (or more!) of the battle with separation anxiety training.
Ready to start?
Remember, this is a gradual process. Some days will be harder than others, and that's completely normal. The method you're using is backed by research and used by certified separation anxiety trainers worldwide.
You've got the tools, you've got the support, and most importantly — you've got this!
Questions? Feature requests? Reach out to us, we’re here to help! support@contentlabs.dev

